Angle-Side-Angle
ASA Illustrated
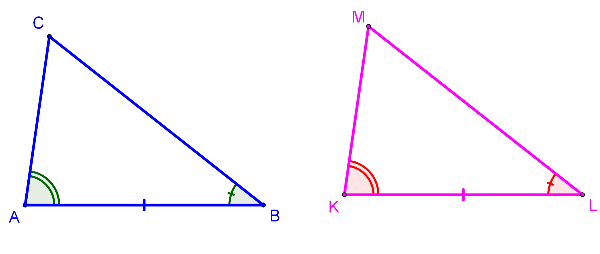
ASA Explained
If two angles and the included side of one triangle are congruent to the
corresponding parts of another triangle, the triangles are congruent.
The "included side" in ASA is the side between the angles being used. It is the
side where the rays of the angles overlap.
Below is an example how to construct this. If you change anything in the
construction, just click on the arrows on the top right to restore the
construction.
Example: Constructing ASA
Steps in constructing ASA
Now you try to draw a triangle congruent to the previous one You need to draw a triangle with side AB=8cm included between an angle CAB of 40 degrees and angle CBA of 30 degrees. Try to do this in the "Applet" below
- Use
 to draw segment AB and if you are requested to give the length type in 5
 - Use
 to draw an angle at point A. (Hint: Always click last on the point where you want the angle.) If requested for the angle size type in 40 degrees. Lastly you need to select clockwise or counterclockwise. The direction of movement is from the line in a clockwise or counterclockwise direction.
 - Use
 to draw a ray from point A through point B' that were created by the angle tool.
 - Use
 to draw an angle at point B. If requested for the angle size type in 30 degrees.
 - Use
 to draw a ray from point B through point A' that were created by the angle tool.
 - Use
 to place point C at the intersection of the two rays
- Use
 to draw triangle ABC