Creating shapes using TinkerCAD!
The 3D printed home is my castle
Creating the model
To be able to press the "print" button, we need 3 steps.
These steps are are:
- A tool to create a 3D model: To create a model, you can choose from one of the mentioned tools. In this case we use a small toy house made by TinkerCAD.
- A printable 3D model: The 3D model and some information about printing quality and the used material need to be fed to the slicer. Before that, please make sure the 3D model contains no holes and has walls that are thick enough.
- Movement information for the printer: The 3D model needs to exist as G-Code that contains the machine movements of the 3D printer. The G-Code is produced by a software called slicer which turns a 3D model into slices as the name says. We use the slicer CuraEngine contained in Repetier-Host.
Create a TinkerCAD account
For now, we will use TinkerCAD and for that, you need to create an account at Autodesk. This account can be used for a variety of things, like using the automatic online repair from Netfabb.
Go to the home of TinkerCAD at https://www.tinkercad.com and select the register button on the top right or use this link: https://www.tinkercad.com/auth/shadowbox_register_fullscreen which will then ask you information inclusing your country, your username, and your email address where you will be sent a link to.
Please also check the spam folder!
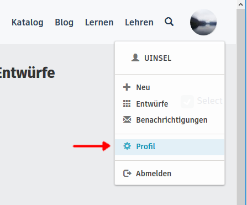
When logged in, you can always access your information in your profile which you can find when clicking your profile image.
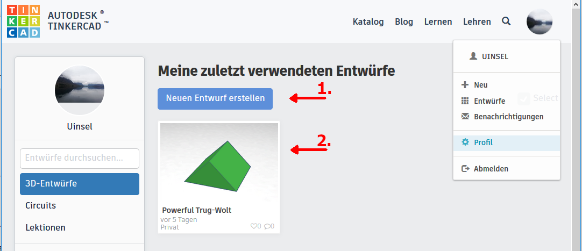
Start a new scetch or continue at an older one
You can either start working on a new idea or commence working on a previously started one.
- When pressing the button, an empty working area appears.
- In case you started befor and want to continue, click on the image of your scetch.
A new scetch
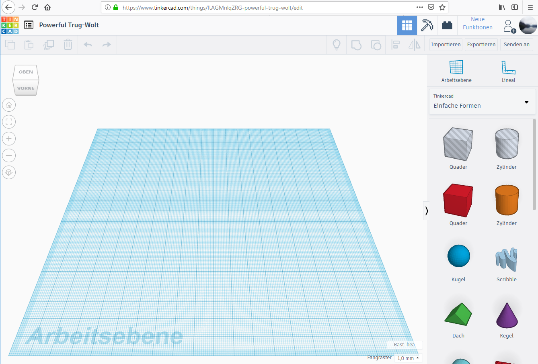
Drag and drop forms
The first thing at a new scetch you will see is an empty working area, waiting to be built on with wonderful ideas. The working area can be rotated by your mouse and items on the right side can be dragged and dropped to the working area. They can be combined or subtracted from each other.
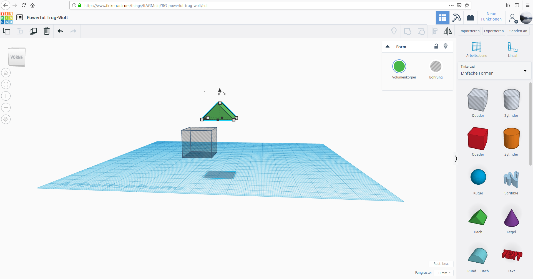
Rotate, rotate, rotate.
You will see little white squares on the edges and arrows on the side. This allows you to manipulate your 3D items to make them bigger, smaller, taller, and rotate them.
Rotating is a magic word here. Always rotate the working area. Rotation gives you additional arrows and squares for manipulation at selected objects. It also shows you where your 3D object is.
Remember we are in 3D here. Things appear smaller when they are further in the back but they are not really smaller. Shadows indicate where they really are.
Keep in mind: always rotate the working area and check your 3D model from all sides.
Moreover, note that there are grey and colored blocks. The grey blocks subtract, the colored blocks add to a form. You can always switch using the round buttons.
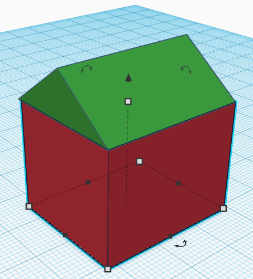
For our house, we first need to reposition our houses roof and then make the house itself a block with volume.
Downloading your file to your computer
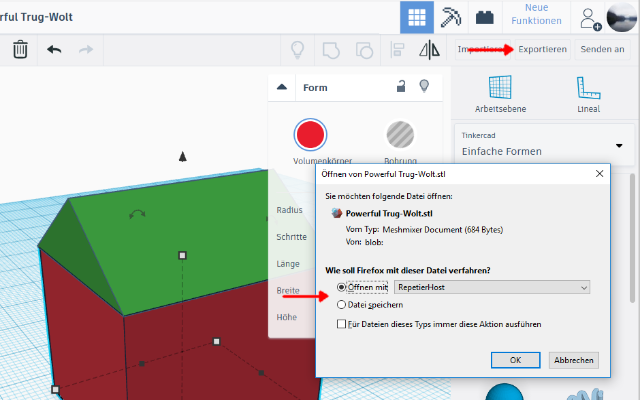
After finalising your 3D model, you can download it to your computer or have it imported into Repetier-Host if it is installed and you selected it to be the default software for 3D files during installing Repetier-Host.
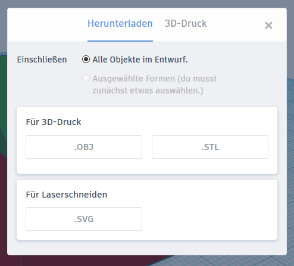
You find the export button on the upper right (here, you can also import existing files) which pops up a menu where you can choose to export all shapes, part of the shapes and whether you want them for 3D print or lasercut.
We want it for 3D print so download it as an STL. In our case, we already open it in Repetier-Host.
Check your house in Repetier-Host
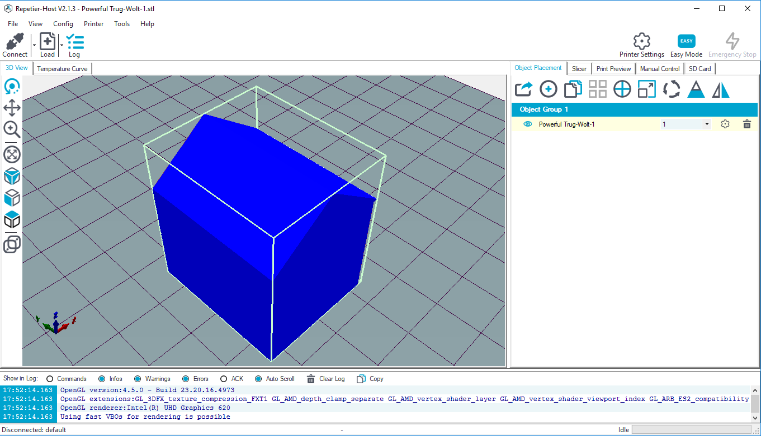
Repetier-Host will tell you if you have grave errors in your 3D model and will attemt to repair them. As our model is simple, we trust it to be ok so far - no Netfabb check needed.
The object should be within the boundaries of the working area of the printer - otherwise it is too big and can not be produced properly. Again rotate - check your house from all sides to check for a flawless shape. Rotation in every software works a bit different so you might need to try other buttons on your mouse for that.
Step one done, 2 steps to go
This was your first step: a 3D model that is producible and is placed on the working area in Repetier-Host. Above the house in the list, you see a few buttons: to export placed items, to add more or duplicate some, to scale them in size or rotate them, and more.
Above those buttons you see several sections of the production journey. The next step after placing the object is slicing it. Clixk on "Slicer"!
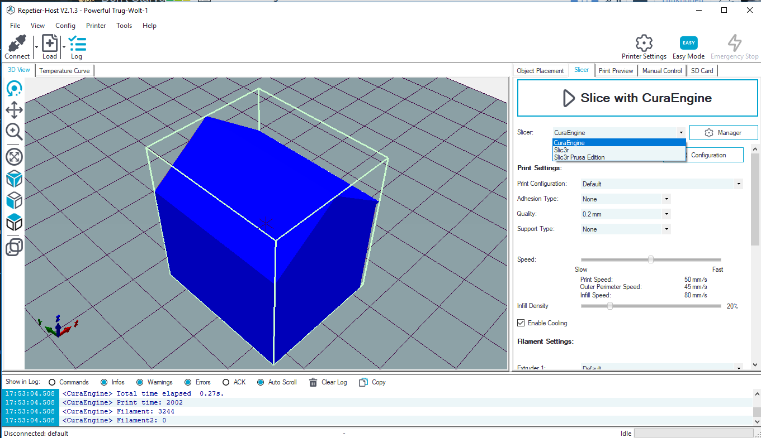
Step 2: Slice for G-Code
Repetier-Host uses external software for slicing. The software we use is called CuraEngine. Select your print configuration for your printer, the thickness of the layers, whether you want any support for overhangs or not, how fast the printer should go and how much material you want on the inside for stability.
You can also choose whether you want it to be cooled during print - it often helps to have a nicer quality. After youre done selecting all your favourite parameters, press the big button "Slice with CuraEngine" and wait until the slicer does its job.
The slicer calculates an estimation of the printing time, how much material you will need, and creates a G-Code file containing all the information for the printer.
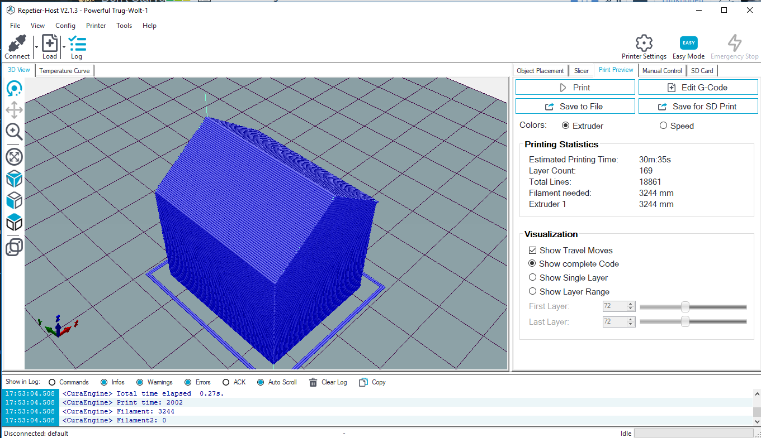
The next step is the preview of the print - press "Print Preview"!
Step 3 - Printing
Now make sure your printer is connected to your computer by pressing the "Connect" button with the plug icon on the top left. This will enabple your print button.
The view will now show you all lines that the material will make. There is a rectangle around the object that will be made additionally to the object. This is done to ensure the material flows properly and any dirt was washed out before the print. In case the printer makes the movements but does not print at least one small part of the rectangle, you should check whether the material flows properly. Abort and repeat the print.
In case at the end of the rectangle material is flowing, the print should work! Yay!
You can also download your G-Code file and print it directly on your printer if your printer supports this. For that, either download the file to your computer and transfer it to an SD card or save it by using "Save for SD print".
The next tabs are obsolete for printing, they are basically showing the current status of your printer. You can check them during your print in case you want to see how warm your filament is heated up or abort your print or just check basic functions like whether your printer is capable of moving.
After your print is done, wait a little to avoid burnt fingers and then remove the print object carefully.