Triangle Construction
Overview
Here is a construction of two triangles. One is an equilateral and one is an isosceles triangle. We can see that the properties hold, making the triangles stay as equilateral and isosceles. The dynamic nature is important to show the properties of both triangles.
Triangles in GeoGebra
Try moving the vertices around on both triangles to see how the properties of an equilateral and isosceles triangles hold.
These two triangles we explored how to make an equilateral triangle as well as an isosceles triangle in GeoGebra.
1. The triangle on the left is the equilateral triangle.
Here are the steps for how to make an equilateral triangle that is dynamic in GeoGebra:
- Click the 5th button on the top menu and select Regular Polygon
- Click the screen in two places and it will open a prompt for the amount of vertices you want
- Type 3 and press enter
- It will show you an equilateral triangle
- Press the 8th button on the top menu and select Distance or Length
- Click each side of the triangle and it will show you the lengths of the triangle
- This will show the distances of each side of the triangle
- Press the 8th button on the top menu and press Angle
- Going counter-clockwise, click the sides on either side of the vertices on each
- This will show the angles of the triangle
- Click the 2nd button on the top menu and select Point
- Put two points anywhere on the screen
- Click the 3rd button on the top menu and press Segment
- Click both points that were on the screen
- Press the 4th button on the top menu and click Perpendicular Bisector
- Click the line between the two points
- This will create a perpendicular bisector
- Click the 2nd button on the top menu and press Point
- Then click the 5th button on the top menu and select Polygon
- Click all three vertices to create the triangle
- Follow the same steps to get the lengths and angles
Definition of Equilateral Triangle and Isosceles Triangle
Grade 9

This applies to grade 9 Shape and Space (3-D and 2-D Shapes) specifically number 3. Here, students will create both triangles and state their similarities and differences.
Students should be able to:
- Determine if the polygons in a given pre-sorted set are similar, and explain the reasoning.
- Draw a polygon similar to a given polygon, and explain why the two are similar.
- Solve a given problem, using the properties of similar polygons.
10-3

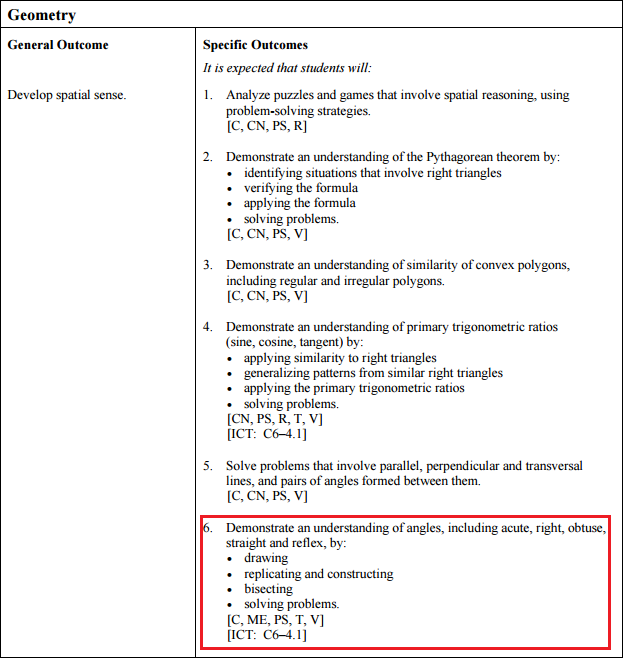
This also applies to 10-3 Geometry specifically number 6. Students will draw triangles using angles and technology. They will construct it in various different ways to reach the same end goal.
Students will be able to:
- Draw and describe angles with various measures, including acute, right, straight, obtuse and reflex angles.
- Identify referents for angles.
- Sketch a given angle.
- Estimate the measure of a given angle, using 22.5°, 30°, 45°, 60°, 90° and 180° as referent angles.
- Measure, using a protractor, angles in various orientations.
- Explain and illustrate how angles can be replicated in a variety of ways; e.g., Mira, protractor,
compass and straightedge, carpenter’s square, dynamic geometry software.
- Replicate angles in a variety of ways, with and without technology.
- Bisect an angle, using a variety of methods.
- Solve a contextual problem that involves angles.
20-2

20-2

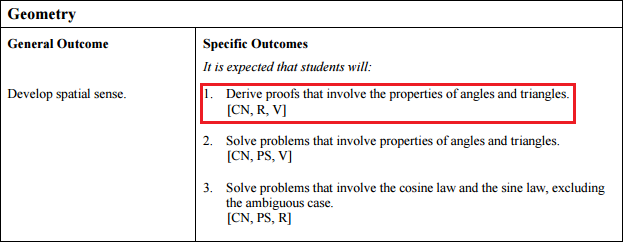
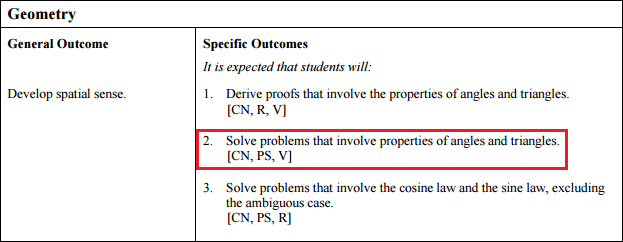
Lastly, this applies to grade 11 Geometry specifically numbers 1 and 2. The students can use the properties of triangles and angles to construct triangles. Also, they can then solve problems that relate to triangles and angles.
Students should be able to:
- Generalize, using inductive reasoning, the relationships between pairs of angles formed by transversals and parallel lines, with or without technology.
- Prove, using deductive reasoning, properties of angles formed by transversals and parallel
lines, including the sum of the angles in a triangle.
- Generalize, using inductive reasoning, a rule for the relationship between the sum of the
interior angles and the number of sides (n) in a polygon, with or without technology.
- Identify and correct errors in a given proof of a property that involves angles.
- Verify, with examples, that if lines are not parallel, the angle properties do not apply.
- Prove, using deductive reasoning, that two triangles are congruent.
As well as:
- Determine the measures of angles in a diagram that includes parallel lines, angles and triangles, and justify the reasoning.
- Identify and correct errors in a given solution to a problem that involves the measures of
angles.
- Solve a contextual problem that involves angles or triangles.
- Construct parallel lines, given a compass or a protractor, and explain the strategy used.
- Determine if lines are parallel, given the measure of an angle at each intersection formed by
the lines and a transversal.
Sample Questions:
Grade 9:
The teacher can ask the students to construct some sort of triangle that is similar to an isosceles or equilateral triangle and ask them to explain why they are isosceles and/or equilateral.
Grade 10:
The students can build the isosceles and equilateral triangles mainly using the properties of the two and focusing on the angles and the relationship to the type of angle constructed.
Grade 11:
Teachers can ask their students to build a both triangles and explain why each of the triangles interior angles add up to 180o and how that relates to the number of sides. Then they could progress to 4 sides and see the relationship between the angles and number of sides using technology.
Conclusion
After constructing the triangles using GeoGebra, I would definitely use this as a tool in my classroom. Everything is laid out nicely and the simpleness of the program allows students of various ages and strengths to use this. It is also efficient in the sense that it does not take that long to make these triangles so the class time would not be mostly spent on the actual construction, but rather the concepts behind it.