Make a Cookie Cutter from a Picture
From shape to cookie
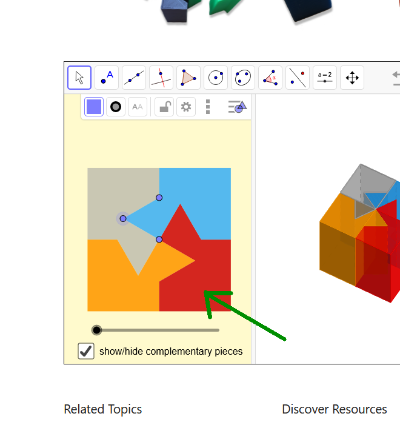
In the previous steps we learned how cube puzzles can be created and how they could look like.
Now we will introduce you to how to make a cookie cutter out of the puzzle shape!
First, decide on a shape using the previous app by Diego.
Next, make a screenshot of your desired shape.
Cookies, remember?
Remember that we create cookies here.
Avoid thin areas as they can get burned during baking. Or simply break if you try to get your cookie out of the oven.
As shown on the picture above, use shapes that have some thickness to them!
Take a program you can use to cut out the shape you want such as eg. Gimp, save the image.
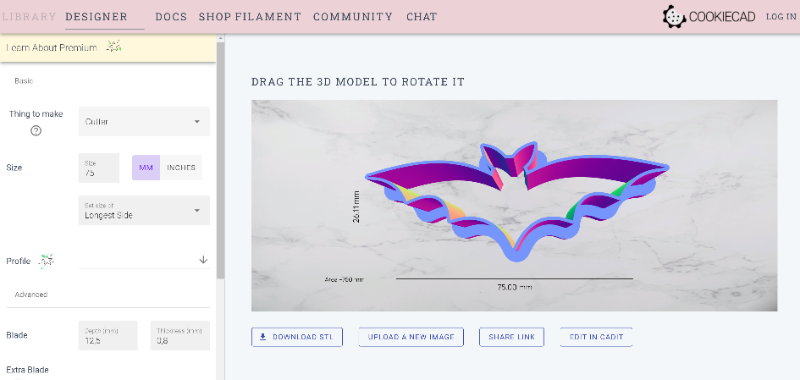
Upload the picture to Cookie Caster! - New Cookie Caster Version
Now use your screenshot as a basis in cookie caster.
Cookie caster can be found using this URL: https://cookiecaster.herokuapp.com/
Unfortunately, CookieCaster is no longer available.
There is this new version available now: http://pub018.cs.technik.fhnw.ch/cookiecaster
There is also CookieCAD: https://cookiecad.com/
Drag and Drop the image
Drag and Drop the image to have it traced
Choose settings wisely!
Trace, choose options, download
You might want to shoose how big your cookie cutter will be, how high you want it to be and how thin you want it.
Afterwards, you are ready log in and download your model!